How To Make DIY Oven-Dried Dehydrated Fruit
The pumpkin spice latte made its annually anticipated return to Starbucks earlier than usual this year, showing up at the end of August. So how can we help but get excited about fall? I have to admit, I’m stoked about the upcoming fall harvest and it won’t be long before I pick up a couple pumpkin spice items. But, while looking forward to winter we all may be less excited about the selection of produce.
Feeling bummed about saying goodbye to those juicy heirloom tomatoes and perfectly ripe mangoes? Don’t worry! You can stock up on all your favorite summer produce while it’s still in season and dehydrate it for later to brighten up your winter – I tried it out and here’s what I learned from making my own dehydrated fruit.
1. Choosing your produce
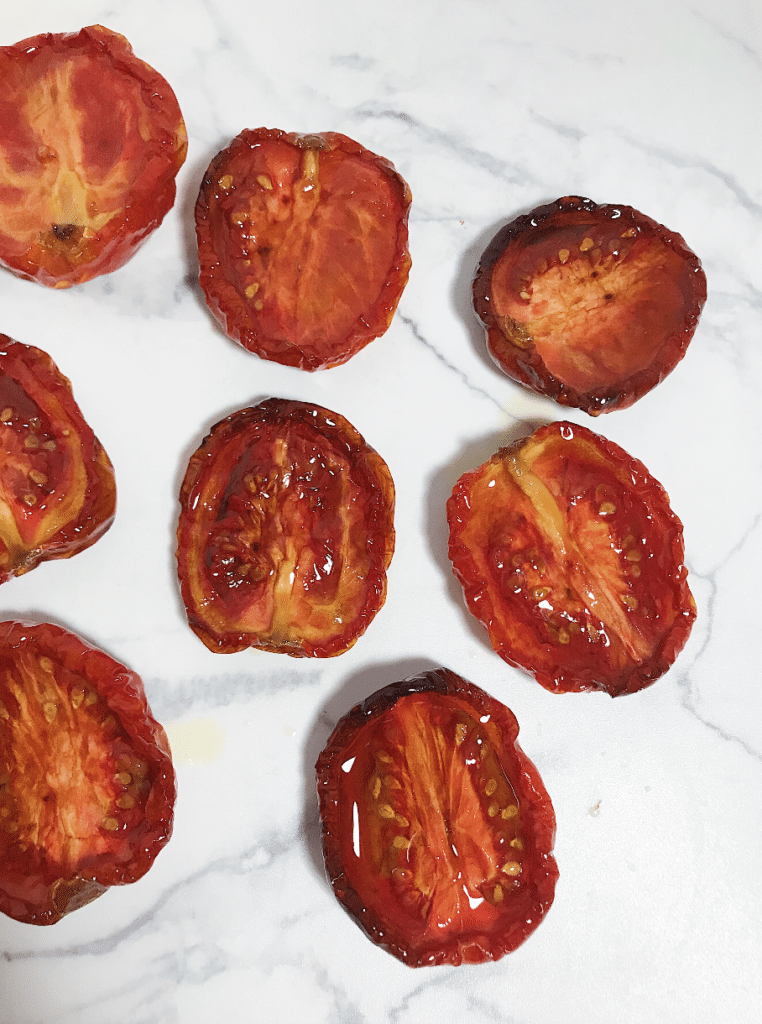
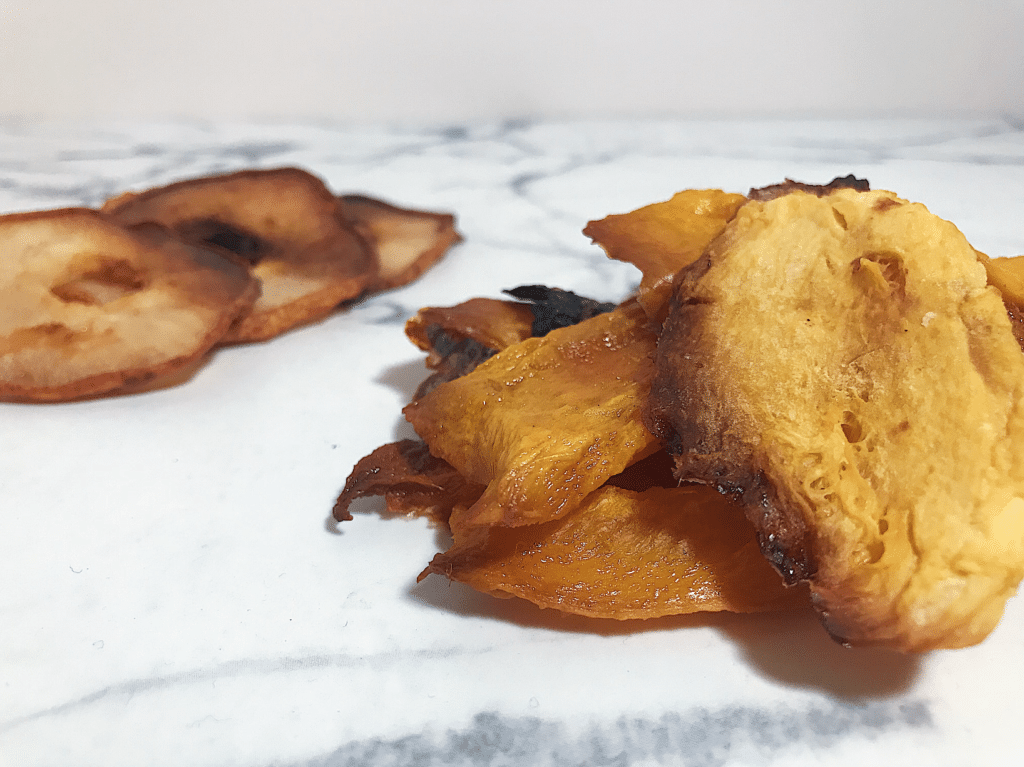
This step was pretty simple. This project was all about choosing and saving the best summer produce that I’m going to miss desperately come December. Head to your local farmer’s market or anywhere with produce you trust and get some of your favorites. I chose mangoes and tomatoes, the two things I know I’ll miss most come winter. I also went ahead and tested this on apples and pears, so you can totally try this out if you’re reading this post summer harvest and want to hop on the DIY dried-fruit train!
2. Preparing your produce
Keep a few things in mind here – mainly, how are you going to want to eat each dried fruit? For fruits like mangoes, you’re definitely going to want to remove the skin, while apples and pears can get dried with their skin. Smaller options (think berries and apricots) are best dried whole, and larger fruits should be thinly sliced.
Once you’ve prepared all your produce, arrange it on a parchment lined baking sheet. Be sure not to space these too close together — you want to make sure your produce dehydrates rather than steaming.
3. Dehydrating your produce
The key here is to dry your produce low and slow. Very low. Preheat your oven as low as it goes; for me, that was 200º F. Depending on how thinly sliced your produce is and the starting water content (think of the difference between a banana and a juicy tomato), the time can vary wildly. While researching, I read anywhere from two hours to eight hours. I found that tomatoes took closer to six hours, while thinly sliced mango, apples, and pears were done after about two. In fact, I burned my mango on my first try – so watch your produce closely, checking on it and flipping it if needed every half hour or so.
This whole process was pretty time-consuming, but it’s mostly hands off and the end result is so rewarding. Now you can have dried fruit all year and eat it confidently knowing it’s not loaded with added sugar and preservatives. Plus, wrap this up in cellophane and festive ribbon and you’ve checked an item off your holiday gifting months in advance! Happy dehydrating!
2 thoughts on “How To Make DIY Oven-Dried Dehydrated Fruit”
Comments are closed.


I enjoyed this, Kira, and I am NOT a kitchen person. I think there’s much better than a snowball’s chance in you know where I might actually try it. You can’t know what a compliment to you it is for me to even imagine myself doing it but trust me, it is.
Hi Rebecca! Thank you so much! I hope you try it out 🙂