DIY NUTritious Nut Milk: How to Make Nut Milk at Home
Confession: I am dietitian who loves to mess around with plant-based recipes — but ones that I think might challenge my skills?…I admit I skip over those sometimes. I used to avoid making nut milks, thinking that they would be expensive, time consuming and messy. I later discovered how easy and delicious it can be (okay…it can be messy but that is just a common theme in my kitchen).
After this discovery, I was kicking myself for not making nut milks sooner. Learning how to make nut milk can be fun and easy, it just requires a bit of planning and the right equipment. The payoff is luxurious and delicious plant-powered milk that makes you feel like you have a fancy-latte-art coffee shop right in your own home.
Step 1: Choose Your Nuts
Looking for a certain flavor profile, or just happen to have some extra nuts laying around? You can make milk out of many kinds of nuts: almonds, hazelnuts, cashews, pecans, walnuts, macadamia – or try a half-and-half mixture!
Take 1 cup of raw nuts and place in a bowl with with a few inches of water covering the nuts. Soak for 8-12 hours. Some nuts are ok to use after 1-2 hours, such as cashews and macadamia nuts but most other nuts should soak for at least 8 hours. Soaking helps soften the nuts and makes them easier to blend, resulting in a smoother, creamier blend. Make sure to use raw nuts – raw nuts are sweeter, less bitter and easier to blend.
Step 2: Blend With Flavor
Drain and rinse the nuts. Place soaked nuts into a high speed blender (such as a Vitamix or Blendtec). Add 3 ½ to 4 cups of water, depending on desired thickness/consistency – less for thicker, more for thinner. Add some foundational flavors to the blender to make the best nut milk:
- For a little sweetener: 2-3 dates (soft, pitted Medjool dates work best) or 1-2 tablespoons maple syrup
- ½ to 1 tsp vanilla extract
- ½ tsp cinnamon
- Pinch of fine sea salt
If you are looking for a plain, unsweetened nut milk, just add nuts and water to the blender. If you want to get creative, try adding some of these flavors into the mix after the foundational flavors:
- ½ cup strawberries (fresh or frozen) for a strawberry milk
- 2 Tbsp cocoa powder for a chocolate milk
- 1-2 Tbsp matcha powder for a green tea milk
- 1 inch piece fresh turmeric or 1 Tbsp ground turmeric for a golden milk
- ⅛ to ¼ tsp nutmeg, cardamom, cloves for a spiced milk
Blend all ingredients on high speed for about 1 minute.
Step 3: Strain
Next, the milk needs to be strained from the pulp. This can be done with fine mesh strainer, a cheese cloth, or what I feel works best – a nut milk bag. These can be found on Amazon for between $5-10.
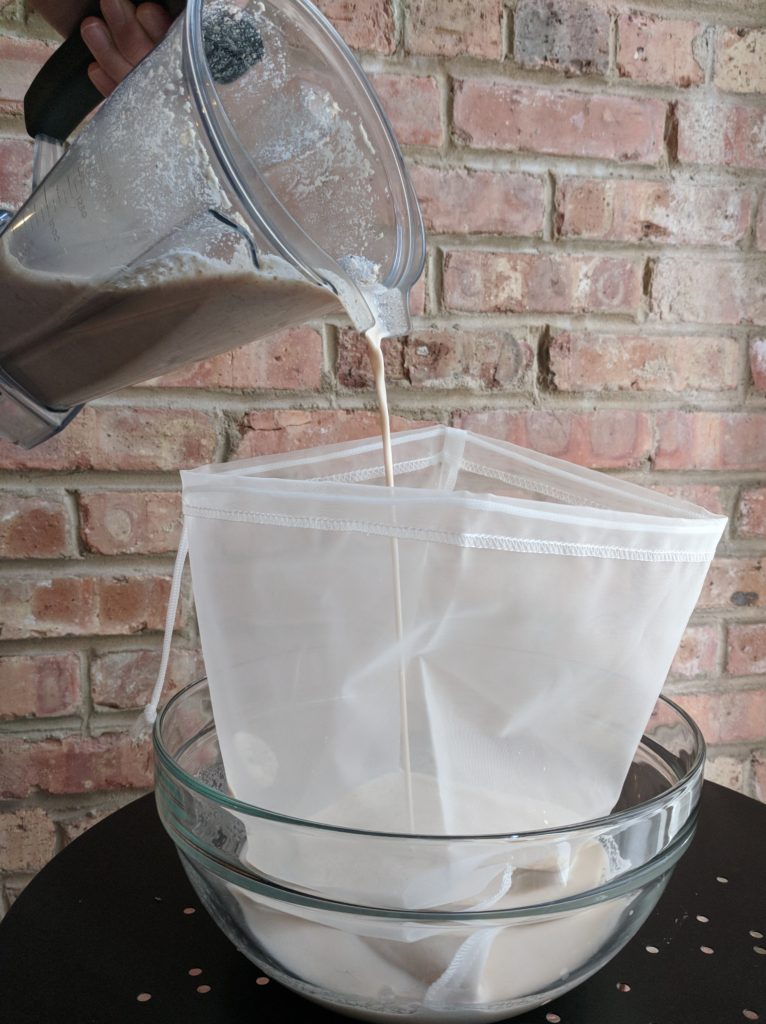
If using a nut milk bag, stand the bag open inside a large bowl, or if using a strainer, place it over the bowl. Pour the mixture from the blender into the bag or through the strainer. As you lift the bag up slightly, some milk will already release. Gently squeeze the bag to slowly release the rest of the milk. It can take a few minutes for all the milk to drain. Set aside the leftover pulp from the bag or strainer.
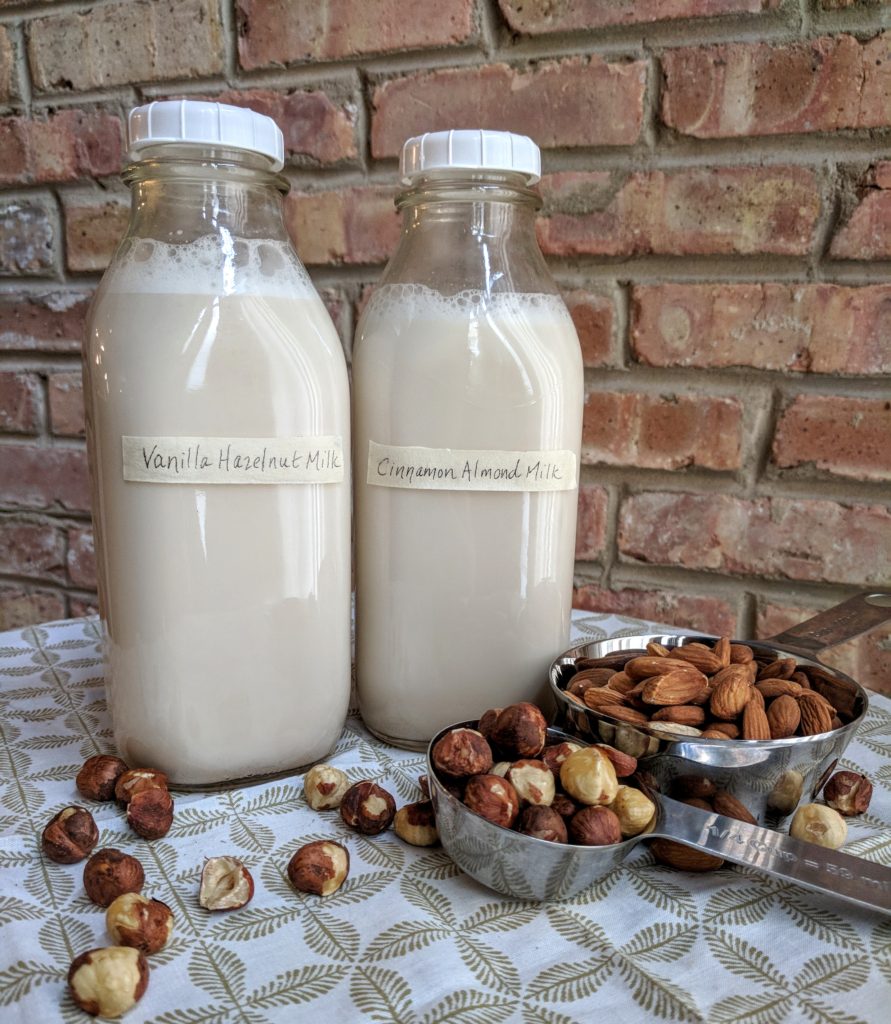
Step 4: Store
Choose a storage container for your nut milk, such as a glass jar or bottle. Carefully pour the milk into the jar (use your handy funnel for this) and seal tightly. Milk can be stored for 3-4 days in the fridge – if you can stop yourself from drinking it for that long! The nut milk will settle when stored, so give it a shake before drinking again.
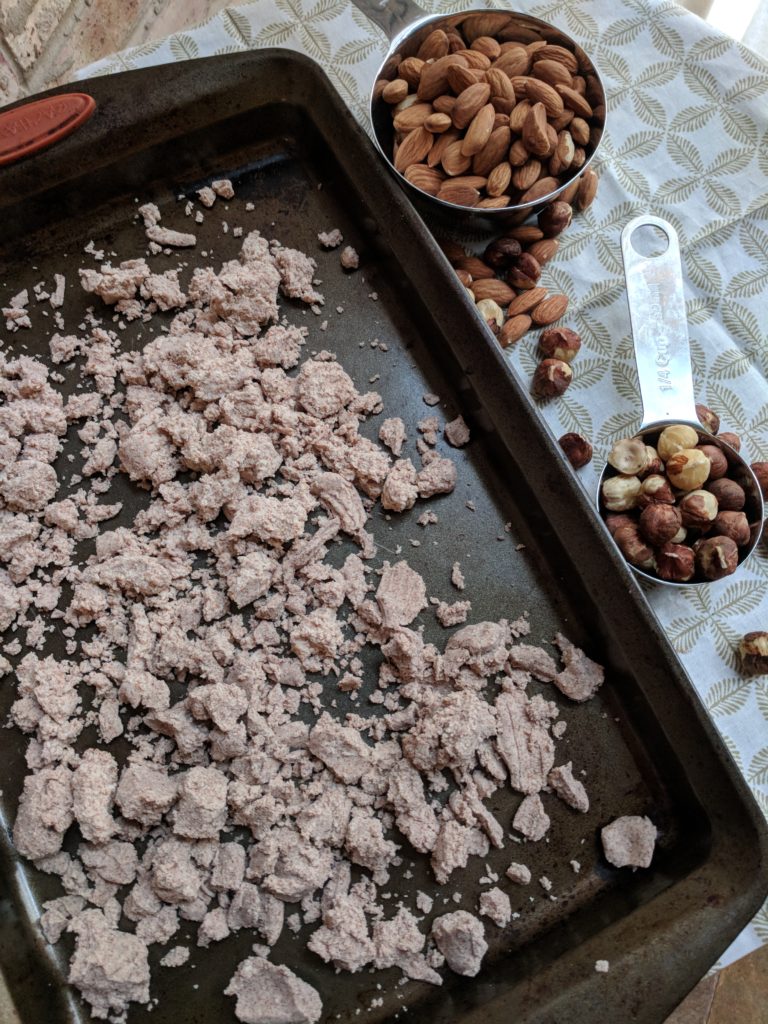
As for the leftover pulp, there is no need to throw it away! The pulp can be reused in many ways, such as:
- Granola: mix 1 cup of leftover raw nut pulp into any homemade granola recipe before baking or dehydrating
- Almond meal: spread leftover almond nut pulp onto a baking sheet and bake in the oven at 300 degrees for about 30 minutes until it’s dry and the edges are slightly golden. Use this in recipes that call for almond meal.
- Homemade crackers, such as these Rosemary Raisin Almond Pulp Crisps by Against All Grain
- Body scrubs, such as this Lavender Almond Pulp Scrub from The Blender Girl
* Homemade nut milk will not have the same amount of vitamin D and calcium as nut milk found at the store. Most store-bought nut milks are fortified with vitamin D and calcium . If you switch over to drinking only homemade nut milk, make sure you are getting these two nutrients from other foods!