

You may have heard about the terms myofascial release or self-myofascial release techniques, especially within the context of foam rolling at the gym pre- or post-workout to aid in warming up and recovery. Research has shown benefits to individuals’ well-being in specific populations (like this study, which describes a 20-week massage-myofascial release program that “significantly improved the pain, anxiety, quality of sleep, and quality of life in patients” with fibromyalgia).

The benefits of self-myofascial techniques
More research and exploration continues to be done regarding the benefits of myofascial release (MFR) and self-myofascial release techniques (SMFR) for all populations and just how far-reaching these benefits are. According to the Fascia Research Society, “among the different kinds of tissues that are involved in musculoskeletal dynamics, fascia has received comparatively little scientific attention.” Essentially, we’re only now uncovering how much fascia has to do with our overall health.
That being said, there’s enough information about what fascia is, how it connects us, and how pervasive it is in the human body, to give us hope that using techniques like myofascial release can help us even beyond our musculoskeletal system.
According to Yoga Medicine and other sources, fascia is often described as “a sensory organ” that aids us in proprioception (understanding where our body is in space). This podcast episode “explains recent research on sensory nerves and points out how important it is for the body to be able to collect a rich picture of what’s happening within us.”
The too-long-didn’t-read summary here: fascia can be described as our “connective tissue network,” “all the collagenous-based soft-tissues in the body,” and our “biomechanical regulatory system.” While there’s been a lot of discussion and research in recent years about how important it is to focus on fascia within the context of our overall health and well-being, we’re still at the tip of the iceberg.
And because there’s still so much to learn, I allow myself a certain amount of intuitive guidance and exploration when it comes to my own self-myofascial release techniques. In addition to meditation and gentle yoga practices like Yin and yoga nidra, incorporating gentle MFR practices into my movement routine helps create more calm for my nervous system. If you’re curious to try out these practices, try these four simple explorations below using the tools described and see how you feel.
What you need to know before trying self-myofascial release practices
A few things to keep in mind before you get started:
- Remember, this isn’t about chasing sensation. On the spectrum of sensation from using the tools, try seeking out a level of sensation that you can still breath gently and deeply with, something you can work with and your nervous system doesn’t respond adversely to.
- Especially when it comes to maintaining a state of ease throughout your body, connection to your breath is key. Focus on slow and steady inhales through your nose and equally as slow and steady exhales through your nose or mouth.
- No need to overdo it. Start with less time and as you feel more comfortable with the practices and the shapes outlined below, feel free to explore with more time and add your own intuitive take.
- Contraindications: Be sure to consult with a medical practitioner before you start any new practice or routine and be sure to familiarize yourself with any contraindications to myofascial and self-myofascial release practices before you give them a try yourself.
The best self-myofascial techniques to relieve tension
Side body expansion

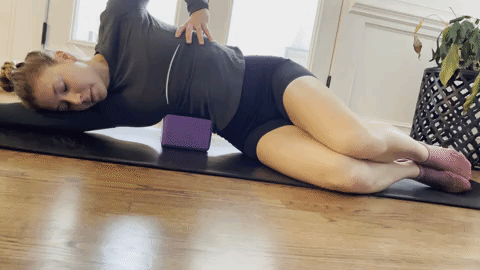
MFR equipment needed:
Very small exercise ball, partially deflated (preferred) or yoga block with towel (to soften edges), extra yoga block/pillows to support your head
What to do:
- Lie on your right side in a fetal position or with a pillow between your knees and additional support under your head. Place your MFR tool under your right side rib cage so that your side can rest over top of the tool.
- Breathe in and feel your left side expand. Breathe out softly and feel your body melt over the tool.
- Stay in one place for five breaths, then move the tool slightly up, down, or right and left and repeat for three to five more breaths.
- Feel free to explore subtle movements, but switch sides after about 90 seconds to two minutes.
How this can help you:
When we get stressed, sometimes our breathing pattern becomes more shallow. To help our body return to a state of more natural, deep expansion, we want our diaphragm (our main respiratory muscle) to expand in 360 degrees. Emphasizing side body expansion on both the left and right sides of our body can help target breath moving here specifically and can help us find overall deeper breathing once again.
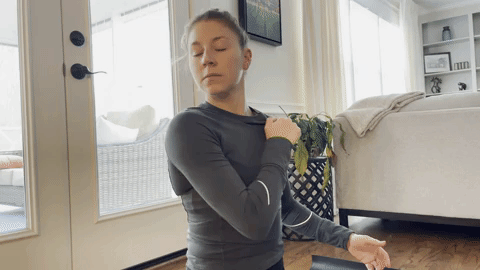
Upper trapezius
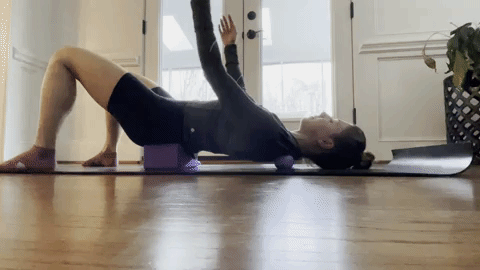
MFR equipment needed:
Two roller rounds (like these) and a yoga block
What to do:
- Place the yoga block under your sacrum and lie down on your back on the floor. Place one roller round on each side of the back of your shoulder, somewhere in the general region as pictured above (avoid your spine) and go just inside of and above your shoulder blade.
- Raise your arms gently from the ground all the way to overhead or as far as you comfortably can.
- Either gently move the arms back and forth or pause and breathe for five to 10 breaths anywhere that feels interesting to you.
- Keep your jaw and glutes relaxed.
How this can help you:
If you notice your posture the next time you’re feeling particularly stressed, note what your shoulders are doing. Are they shrugging up toward your ears? Placing the round recovery tools in this location provides pressure in this area that could’ve become chronically overworked. Not only does it provide sensory feedback (you may feel sensation in other places in your upper body, chest, jaw and neck, too), upon removing the tools, it can improve circulation in the area.
Glutes
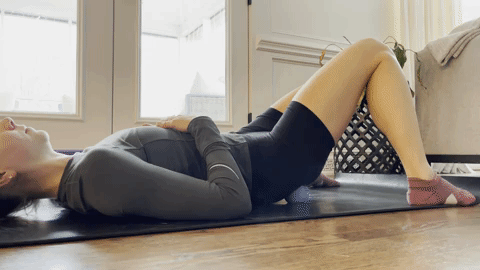
MFR equipment needed:
Two roller rounds
What to do:
- Begin to lie down and place the round recovery tools in the middle of each gluteal region.
- Keep your knees bent and feet on the floor. Start with feet parallel, and to intensify the sensation of where the tools are, keep them in the same location and walk your feet out and let your knees fall inward.
- Keep your jaw and abs relaxed.
- Either hold still for five to 10 breaths or move your knees just slightly to create a gentle movement of the muscle and fascial tissue around the tools.
- Focus on breathing all the way down into your glutes as you inhale softly through your nose and avoid clenching your glutes.
How this can help you:
When we get stressed, another strategy our body finds to grip and hold on (often unconsciously) is to clench the glutes. When we clench our glutes and they’re “on” just a little bit but over a long period of time, other compensations can start to occur as those muscles begin to fatigue and our system suffers overall. By setting up in this position, we’re working on communicating to those deeper hip rotator muscles like the piriformis to provide more sensory awareness to this area and offer you feedback when you start to grip or clench.
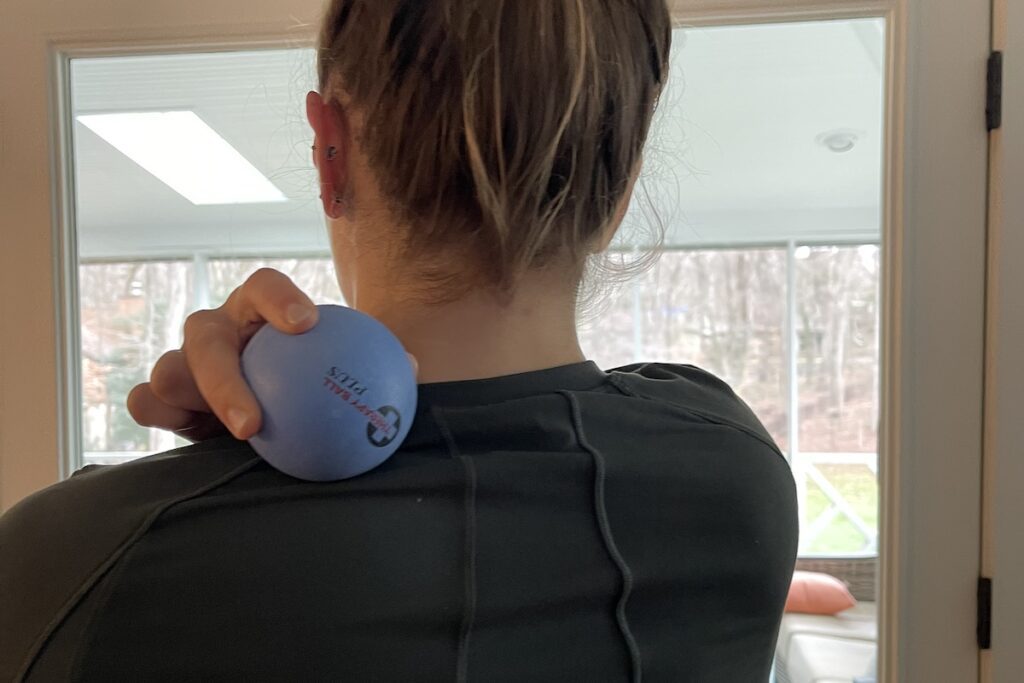
Jaw, neck, and anterior chest
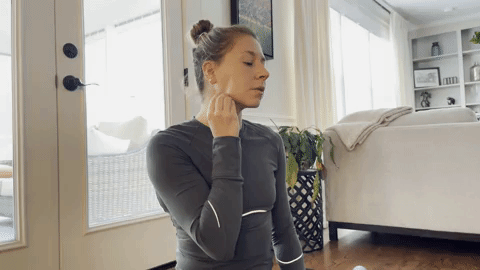
MFR equipment needed:
One roller round and one smaller roller tool, like this one
What to do:
- From any comfortable seated position, use the smaller of your roller tools along the jawline. Pause anywhere it feels interesting and open and close your jaw. Explore the space between the jaw line and side and top of your neck.
- Depending on the type of tool you’re using, you can use the grippy surface along the front of your chest, just below your collarbone, too. Explore rolling the tool in one direction and turning your head in the opposite direction. Explore pinning the tool down toward the front of your chest, then breathing into that spot and exhaling for longer than you inhale.
How this can help you:
Another place our bodies hold stress is in our jaw. Spending some time exploring all the layers of connection around your jaw will help you feel where you might be holding tension. The muscles along the side of the neck, and even our pecs, can benefit from slow, steady deep breathing as we practice this work. (Fun fact: When we move into that shallow breathing pattern from stress or other reasons, the accessory muscles that help us breathe like the scalene, sternocleidomastoid, and pec minor can become more primary than the diaphragm. As you practice this kind of MFR work, focus on 360-degree breathing into your rib cage and keep your jaw relaxed.)
What to do when you’re done
Take a moment in a comfortable position to breathe naturally and feel the effects of your practice settle in. You can do this lying down or seated. Just give yourself some space to reintegrate and let the breath return back to normal. Notice all the space you’ve made.